Δεκέμβριος 2012 - Δημοσιεύσεις
I have decided to write a series of posts on how to write a small ASP.Net MVC 4.0 application.I will develop this application step by step and I will explain everything that you need to know in order to develop ASP.Net MVC 4.0 applications. This is the fourth post in this series. You can find the first one here , the second one here and the third one here. Make sure you read and understand those posts.
I am building an ASP.Net MVC application where users can enter movies and rate them. As we develop our application I will change the requirements and add more features. My goal is to have a working application and at the same time show you the building blocks of ASP.Net MVC. In the last post we have created the entities needed in order to store and retrieve data (models,views and the database).
Now I would like to talk about Code Blocks and Code Expressions in Razor Views.
1) Launch Visual Studio and open the ASP.Net MVC application
2) Open the Index.cshtml from the Views/Movie folder.These are the contents of the view
@model IEnumerable<MovieReviews.Models.Μovie>
@{
ViewBag.Title = "Index";
}
<h2>Index</h2>
<p>
@Html.ActionLink("Create New", "Create")
</p>
<table>
<tr>
<th>
@Html.DisplayNameFor(model => model.Name)
</th>
<th>
@Html.DisplayNameFor(model => model.Director)
</th>
<th>
@Html.DisplayNameFor(model => model.YearReleased)
</th>
<th></th>
</tr>
@foreach (var item in Model) {
<tr>
<td>
@Html.DisplayFor(modelItem => item.Name)
</td>
<td>
@Html.DisplayFor(modelItem => item.Director)
</td>
<td>
@Html.DisplayFor(modelItem => item.YearReleased)
</td>
<td>
@Html.ActionLink("Edit", "Edit", new { id=item.Id }) |
@Html.ActionLink("Details", "Details", new { id=item.Id }) |
@Html.ActionLink("Delete", "Delete", new { id=item.Id })
</td>
</tr>
}
</table>
The responsibility of this view is to take the model passed by the controller and present the data to the users through the template. The View is nothing more than a template where the data passed from the model is presented.We combine literal text (e.g <h2></h2>) with pieces of data from the model through C# code (@).
Code Expressions
An example of code expressions from the view above
<td>
@Html.DisplayFor(modelItem => item.Name)
</td>
The code in bold is a code expression.The code expression will be evaluated by the Razor engine and the output (which will be displayed in a column of an html table) will be presented to the client.
Code blocks
An example of code block from the view above
@
{
ViewBag.Title = "Index";
}
Between the curly braces we can add as much C# code as we want.Let me modify a little bit the View above
@{
ViewBag.Title = "Index";
var reviewscount = Model.Count();
}
<h2>Index</h2>
<h3> the number of the reviews so far is : @reviewscount </h3>
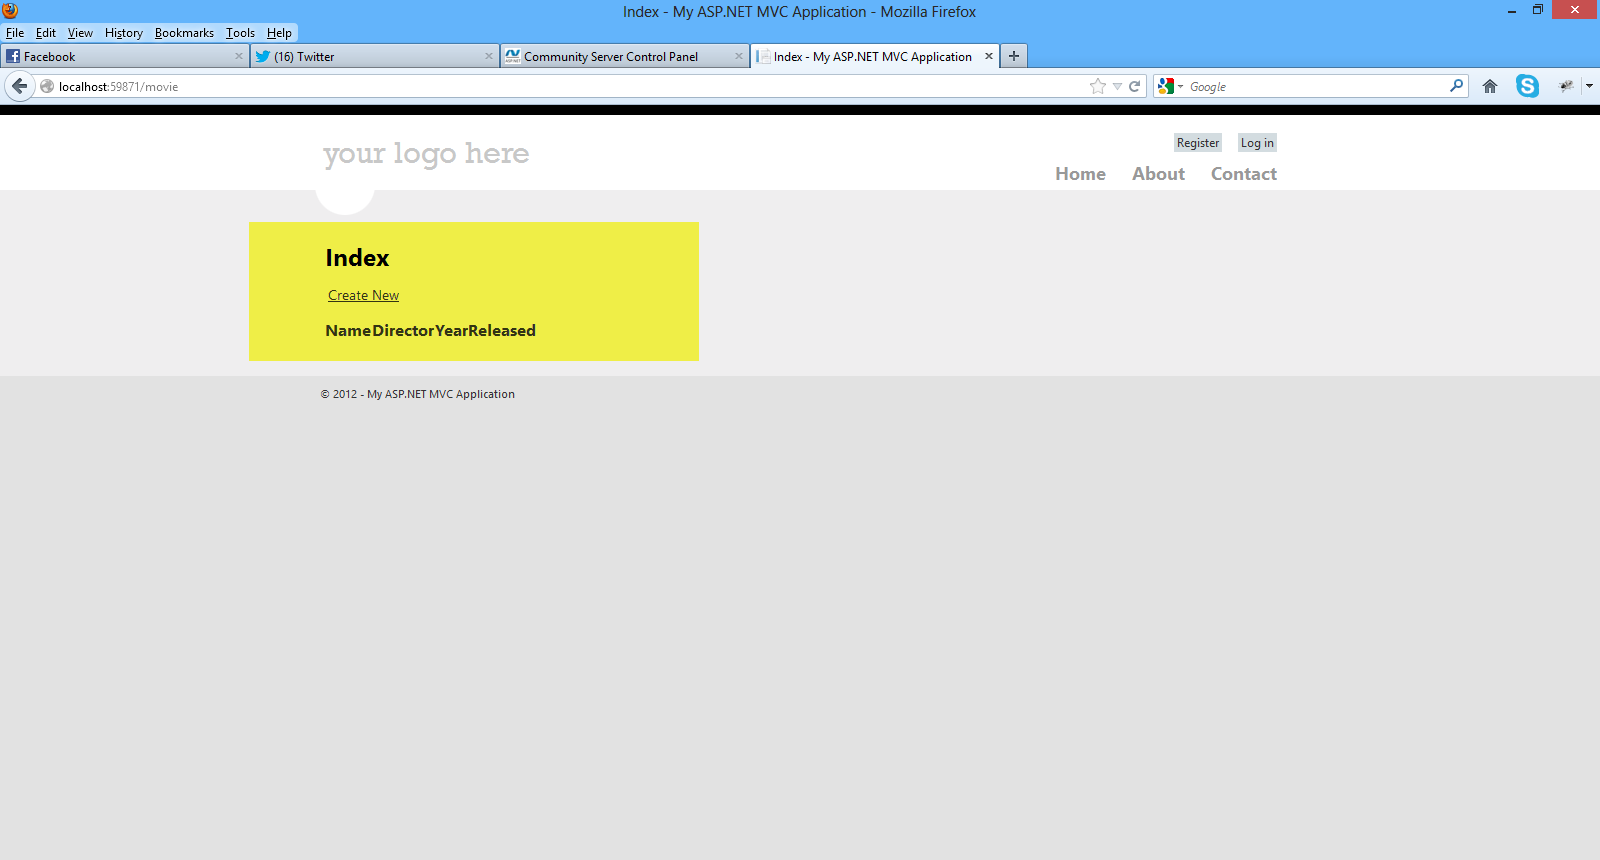
The code I changed is in bold.Run your application again http://localhost:59871/movie (http://localhost:yourport/movie) in your case.
I added a new variable inside the code block and then used the variable (reviewscount) in a place I wanted inside the view as a code expression. Hope all makes sense so far.
3) Now I would like to point out at this point are HTML Helpers that are part of any View in the ASP.Net MVC applications.Their purpose is to create small blocks of HTML.There are helpers like to create links,inputs,labels,forms,validation messages and much more.
Think of them like traditional ASP.NET Web Form controls.
We use HTML helpers are used to modify HTML. HTML helpers
do not have an event model and a view state.
In most cases, an HTML helper is just a method that returns a string.
Let's have a look at the
@Html.ActionLink("Edit", "Edit", new { id=item.Id }) |
This is the easiest way to render an HTML link
The Html.ActionLink() does not link to a view. It creates a link to
a controller action.
You also can see more HTML Helpers in the View
- Html.DisplayNameFor() - which Gets the display name for the model
- Html.DisplayFor() will render the DisplayTemplate that matches the property's type
There are more HTML helpers can be used to render (modify and output) HTML
form elements:
- BeginForm()
- EndForm()
- TextArea()
- TextBox()
- ValidationMessageFor()
We will see more of those as we move on.
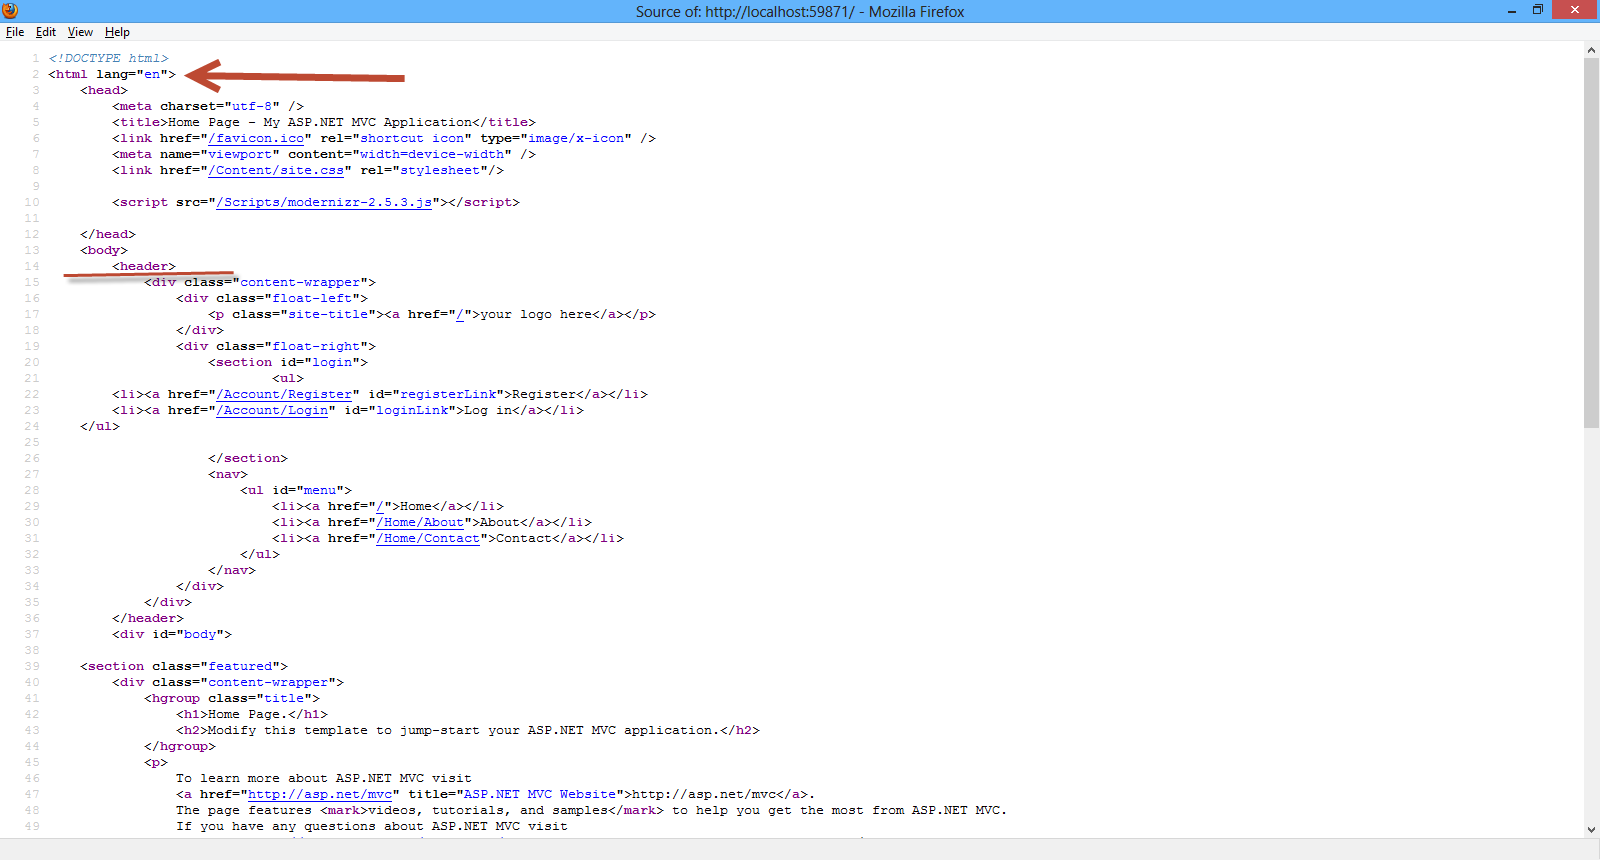
3) When you run your application and navigate to the http://localhost:59871/movie you see HTML elements that are not in the current view (Index view).
I mean the navigation system (menu) the header,logo and the footer.Where does this markup come from? It comes form the Layout View.Υοu can think of this as the master pages in web forms applications.
Have a look at the picture below to see what I mean

Have a look in the Shared folder in the Solution Explorer. You will see the_Layout.cshtml.
<!DOCTYPE html>
<html lang="en">
<head>
<meta charset="utf-8" />
<title>@ViewBag.Title - My ASP.NET MVC Application</title>
<link href="~/favicon.ico" rel="shortcut icon" type="image/x-icon" />
<meta name="viewport" content="width=device-width" />
@Styles.Render("~/Content/css")
@Scripts.Render("~/bundles/modernizr")
</head>
<body>
<header>
<div class="content-wrapper">
<div class="float-left">
<p class="site-title">@Html.ActionLink("your logo here", "Index", "Home")</p>
</div>
<div class="float-right">
<section id="login">
@Html.Partial("_LoginPartial")
</section>
<nav>
<ul id="menu">
<li>@Html.ActionLink("Home", "Index", "Home")</li>
<li>@Html.ActionLink("About", "About", "Home")</li>
<li>@Html.ActionLink("Contact", "Contact", "Home")</li>
</ul>
</nav>
</div>
</div>
</header>
<div id="body">
@RenderSection("featured", required: false)
<section class="content-wrapper main-content clear-fix">
@RenderBody()
</section>
</div>
<footer>
<div class="content-wrapper">
<div class="float-left">
<p>© @DateTime.Now.Year - My ASP.NET MVC Application</p>
</div>
</div>
</footer>
@Scripts.Render("~/bundles/jquery")
@RenderSection("scripts", required: false)
</body>
</html>
We have the head section that will be present in all pages
<head>
<meta charset="utf-8" />
<title>@ViewBag.Title - My ASP.NET MVC Application</title>
<link href="~/favicon.ico" rel="shortcut icon" type="image/x-icon" />
<meta name="viewport" content="width=device-width" />
@Styles.Render("~/Content/css")
@Scripts.Render("~/bundles/modernizr")
</head>
Then you have the header section that will appear in all pages
<header>
<div class="content-wrapper">
<div class="float-left">
<p class="site-title">@Html.ActionLink("your logo here", "Index", "Home")</p>
</div>
<div class="float-right">
<section id="login">
@Html.Partial("_LoginPartial")
</section>
<nav>
<ul id="menu">
<li>@Html.ActionLink("Home", "Index", "Home")</li>
<li>@Html.ActionLink("About", "About", "Home")</li>
<li>@Html.ActionLink("Contact", "Contact", "Home")</li>
</ul>
</nav>
</div>
</div>
</header>
Then you have the header section that will appear in all pages
<footer>
<div class="content-wrapper">
<div class="float-left">
<p>© @DateTime.Now.Year - My ASP.NET MVC Application</p>
</div>
</div>
</footer>
At one point we see a call to the RenderBody()
<div id="body">
@RenderSection("featured", required: false)
<section class="content-wrapper main-content clear-fix">
@RenderBody()
</section>
When the Layout View calls RenderBody(), that is when the content View (index.cshtml) will be inserted and rendered at this exact point in the HTML markup.
How does ASP.Net MVC to call the Layout View before our content View? It is because of this file _ViewStart.cshtml
The contents of the _ViewStart.cshtml follow
@{
Layout = "~/Views/Shared/_Layout.cshtml";
}
ASP.Net MVC runtime knows to render first the Layout View (because the _ViewStart.cshtml runs first before any other view ) and then the Content View.
4) Another important topic in ASP.Net MVC applications are Partial Views.At some point in the _Layout.cshtml view there is a call to the _LoginPartial partial view.
<section id="login">
@Html.Partial("_LoginPartial")
</section>
A partial view is a view that we place code (HTML & C#) that we will often reuse in other views..
Have a look at the contents of the _LoginPartial.cshtml
@if (Request.IsAuthenticated) {
<text>
Hello, @Html.ActionLink(User.Identity.Name, "Manage", "Account", routeValues: null, htmlAttributes: new { @class = "username", title = "Manage" })!
@using (Html.BeginForm("LogOff", "Account", FormMethod.Post, new { id = "logoutForm" })) {
@Html.AntiForgeryToken()
<a href="BLOCKED SCRIPTdocument.getElementById('logoutForm').submit()">Log off</a>
}
</text>
} else {
<ul>
<li>@Html.ActionLink("Register", "Register", "Account", routeValues: null, htmlAttributes: new { id = "registerLink" })</li>
<li>@Html.ActionLink("Log in", "Login", "Account", routeValues: null, htmlAttributes: new { id = "loginLink" })</li>
</ul>
}
So this is a type of special View that we must know and use so we make our application easier to maintain.
5) Now it is time to have a look at some important topics that are related with Controllers.Open the MovieController.cs file.
I would like to talk a bit about ActionResults and what thet are
The ActionResult is an abstract base class for other types of actions.
Other classes inheriting from the ActionResult :
- ContentResult
- EmptyResult
- FileResult
- HttpStatusCodeResult
- JavaScriptResult
- RedirectResult
- RedirectToRouteResult
- ViewResult
The ViewResult renders a specifed view to the client.
The
RedirectResult performs an HTTP redirection to a specified URL
The ContentResult writes content to the client without requiring a view.
In this method Index() the result of this method is ActionResult , which means we will call the Index.cshtml (passing the model to it) in the Views/Movie folder.
So the results of this view will be displayed to the client.
private MovieDBContext db = new MovieDBContext();
//
// GET: /Movie/
public ActionResult Index()
{
return View(db.Movies.ToList());
}
Another very important topic is Action Selectors.Some of them are ActionName, AcceptVerbs.
An ActionSelector dictates which action method is triggered.They come with the form of attributes.
Have a look at the MovieController.cs file and the Delete method
[HttpPost, ActionName("Delete")]
public ActionResult DeleteConfirmed(int id)
{
Μovie μovie = db.Movies.Find(id);
db.Movies.Remove(μovie);
db.SaveChanges();
return RedirectToAction("Index");
}
ActionName will specify the name of this method. It can be reached by Delete and not DeleteConfirmed
AcceptVerbs (HttpPost,HttpGet) represent attributes that specify which HTTP verbs (Get , Post) an action method will respond to.
In the example above we have an HTTP Post - [HttpPost, ActionName("Delete")]
The final topic I would like to talk about is Action Filters. They are applied to methods and classes in the form of attributes.An ActionFilter provides some methods that are run before and after request and response processing.
Some of them are
- OutputCache, which caches the output of the controller
- Authorize, that restricts an action to authorized users or roles
If I open the MovieController.cs file and then apply the [Authorize] (see below) to the Index() method
private MovieDBContext db = new MovieDBContext();
//
// GET: /Movie/
[Authorize]
public ActionResult Index()
{
return View(db.Movies.ToList());
}
and then navigate to the http://localhost:59871/movie, this is what I will get the following as a result (redirect to the login page)
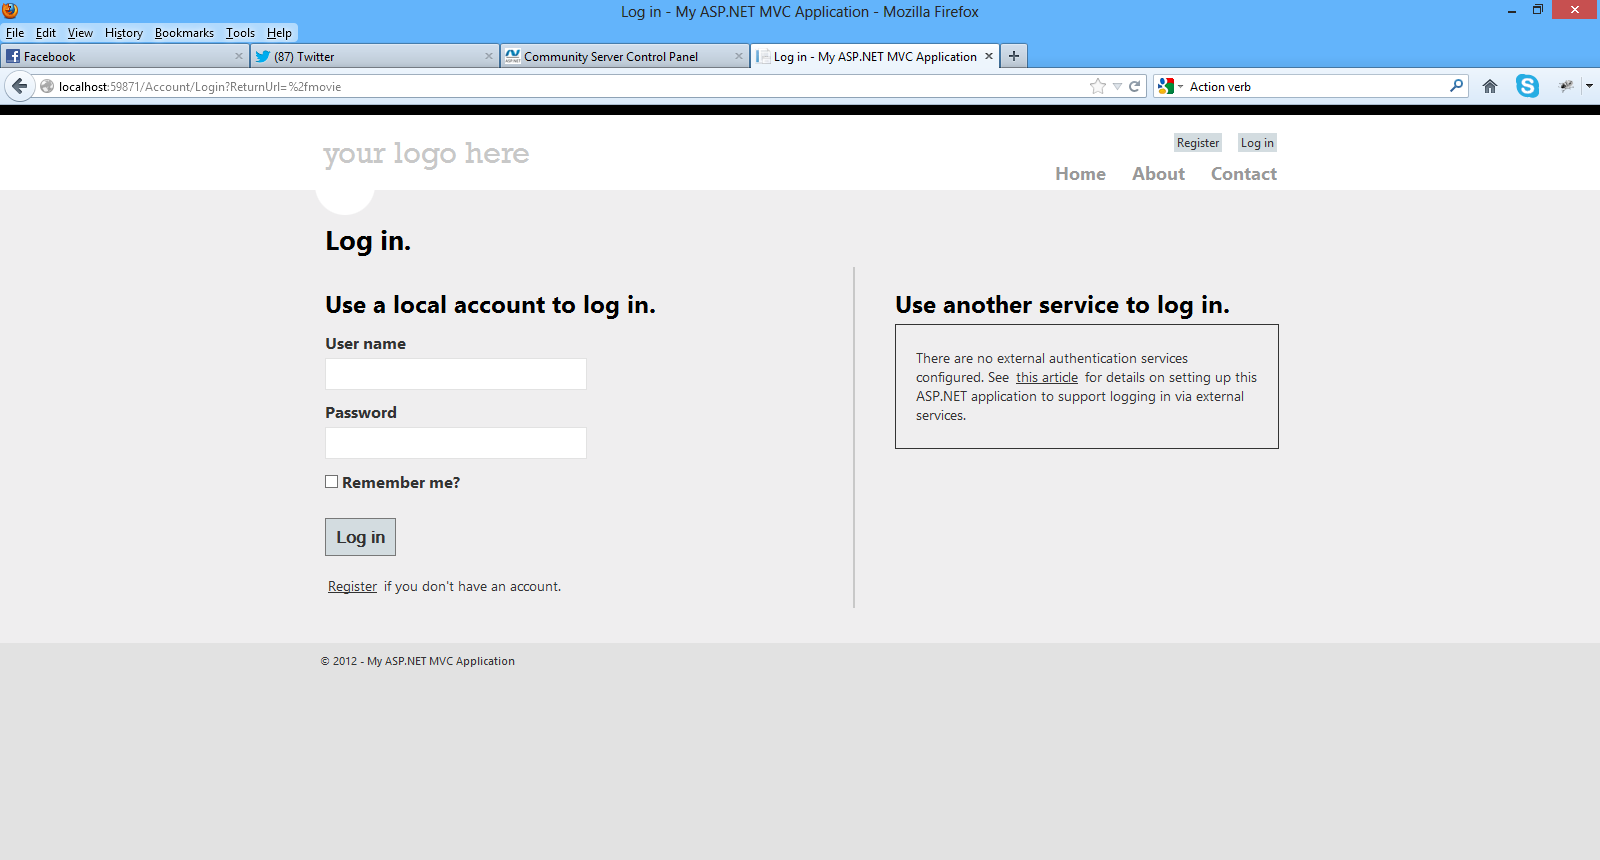
The ASP.Net MVC runtime will pick up the [Authorize] attribute and redirect me to the Login page.
Hope you have followed along and mastered the topics presented here as they are absolutely necessary for building ASP.Net MVC applications.
In the next post we will continue building our application.
Hope it helps!!!

I have decided to write a series of posts on how to write a small ASP.Net MVC 4.0 application.I will develop this application step by step and I will explain everything that you need to know in order to develop ASP.Net MVC 4.0 applications. This is the third post in this series. You can find the first one here and the second one here. Make sure you read and understand the first post and the second post.
As I design and develop the application I will explain some of the most common building blocks of ASP.Net MVC like Code blocks,Code expressions,Action Results,Action Selectors,Action Filters, Layout Views and Partial Views.
Now we have to think about the data access technology that we will use in our sample application. I am going to build an ASP.Net MVC application where users can search through a collection of movies and rate them.
I will not use traditional ADO.Net data access techniques. I will use Entity Framework (EF) which is part of the .Net framework.
Obviously I cannot go into much detail on what EF is and what it does. I
will give again a short introduction.The .Net framework provides support
for Object Relational Mapping through EF. So EF is a an ORM tool and
it is now the main data access technology that microsoft works on. I
use it quite extensively in my projects. Through EF we have many things
out of the box provided for us. We have the automatic generation of SQL
code.It maps relational data to strongly types objects.All the changes made to the objects in the memory are persisted in a transactional way back to the data store.
You can search in my blog, because I have posted many posts regarding ASP.Net and EF.
There are different approaches (paradigms) available using the Entity Framework, namely Database First, Code First, Model First.
You can find in this post an example on how to use the Entity Framework to retrieve data from an SQL Server Database using the "Database/Schema First" approach.
In this approach we make all the changes at the database level and then we update the model with those changes.
In this post you can see an example on how to use the "Model First" approach when working with ASP.Net and the Entity Framework.
This model was firstly introduced in EF version 4.0 and we could start with a blank model and then create a database from that model.When we made changes to the model , we could recreate the database from the new model.
The Code First approach is the more code-centric than the other two. Basically we write POCO classes and then we persist to a database using something called DBContext.
In this application we will us the Code First approach when building our data-centric application with EF.
Code First relies on DbContext. We create 2,3 classes (e.g Movie,Review) with properties and then these classes interact with the DbContext class.Then we can create a new database based upon our POCOS classes and have tables generated from those classes.We do not have an .edmx file in this approach.By using this approach we can write much easier unit tests.
DbContext is a new context class and is smaller,lightweight wrapper for the main context class which is ObjectContext (Schema First and Model First).
When building an application the most important thing is to understand the domain and the domain-business objects. These should be the objects that should drive the application and not e.g the database schema. So I like to design my entities very carefully and
1) Launch Visual Studio and open your application.
2) We will add the 2 entities I am going to show you below in the Models folder. Add a new class file named Movie.cs inside the Models folder.The Movie.cs entity is as follows
public class Μovie
{
public int Id { get; set; }
public string Name { get; set; }
public string Director { get; set; }
public DateTime YearReleased { get; set; }
public ICollection<MovieReview> Reviews { get; set; }
}
We have added some properties in this entity. Now we need to add the MovieReview entity. Add a new class file named MovieReview.cs inside the Models folder.The MovieReview.cs entity is as follows.
public class MovieReview
{
public int Id { get; set; }
public int Rating { get; set; }
public string Comment { get; set; }
public int MovieId { get; set; }
}
So we have our entities ready. We have one movie and many reviews. That should be clear by now.
I will instantiate these objects store them and retrieve them in my database. My database will be an SQL Server database where I will create from the entities!!!!
Then we need to create a context class that inherits from DbContext.Add a new class to the Models folder.Name it MovieDBContext.cs .Now that we have the entity classes created, we must let the model know.I will have to use the DbSet<T> property.The code for this class follows
public class MovieDBContext:DbContext
{
public DbSet<Μovie> Movies { get; set; }
public DbSet<MovieReview> Reviews { get; set; }
}
The MovieDBContext is a database context class.This class is responsible for talking to the underlying database,storing and updating the data to the database.
We need to add this reference to the file
using System.Data.Entity;
Now we need to create the connection string.The only place we can do that is by opening the web.config file and adding the following lines of code (inside the <connectionStrings> section)
<connectionStrings>
<add name="FootballerDBContext"
connectionString="Data Source=(LocalDb)\v11.0;AttachDbFilename=|DataDirectory|\MovieReviews.mdf;Integrated Security=True"
providerName="System.Data.SqlClient" />
</connectionStrings>
3) Now we need to access our model from a controller.This is going to be a simple class that retrieves the footballers data.
Right-click the Controllers folder and create a new MovieController controller. Have a look at the picture below to set the appropriate settings and then click Add
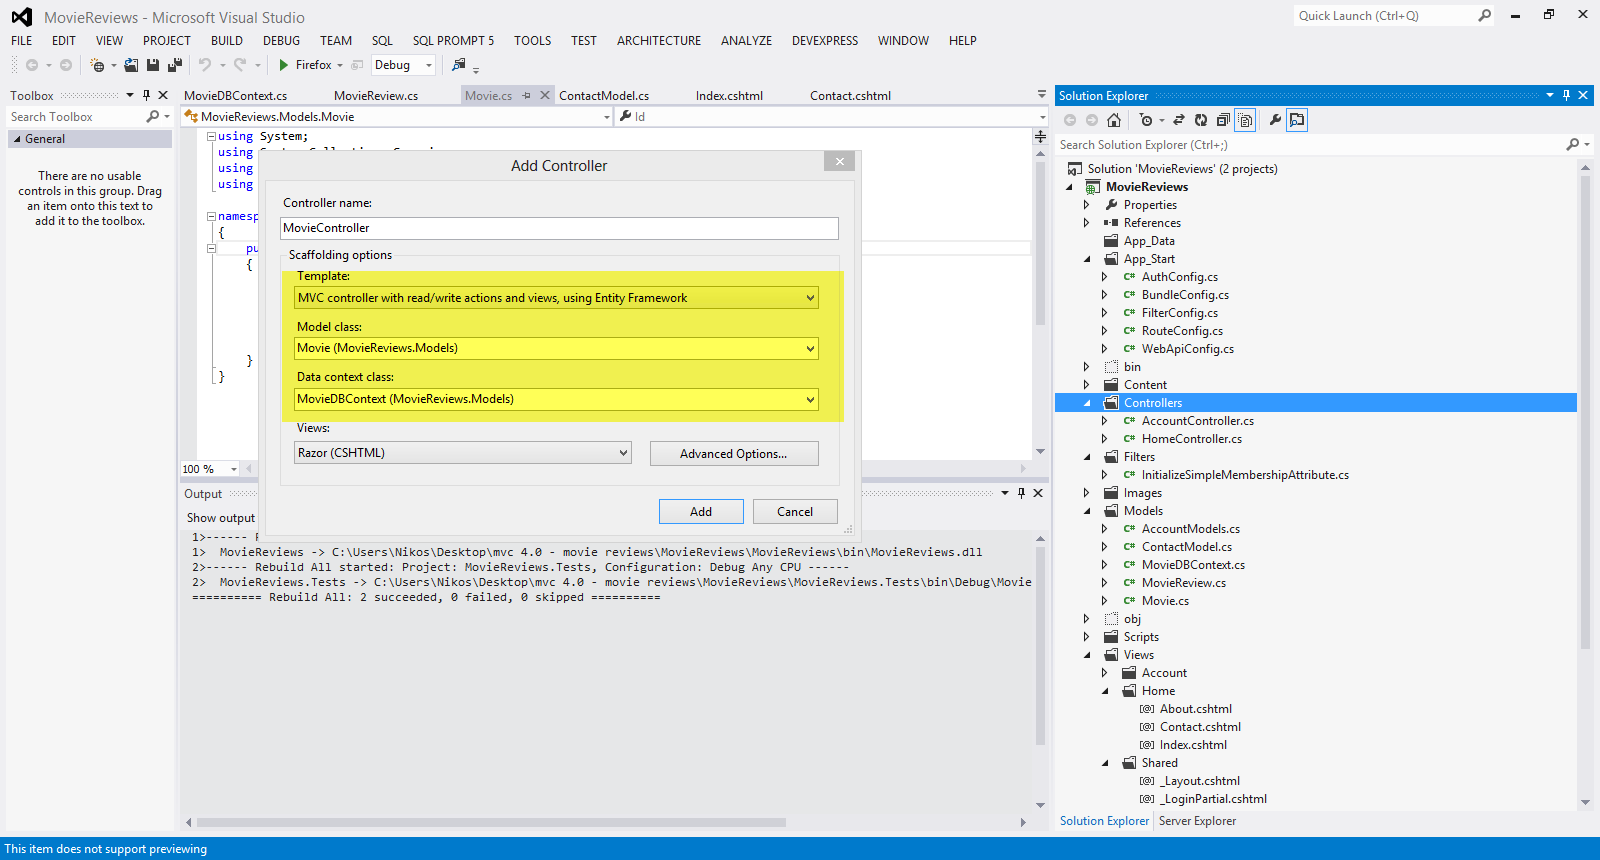
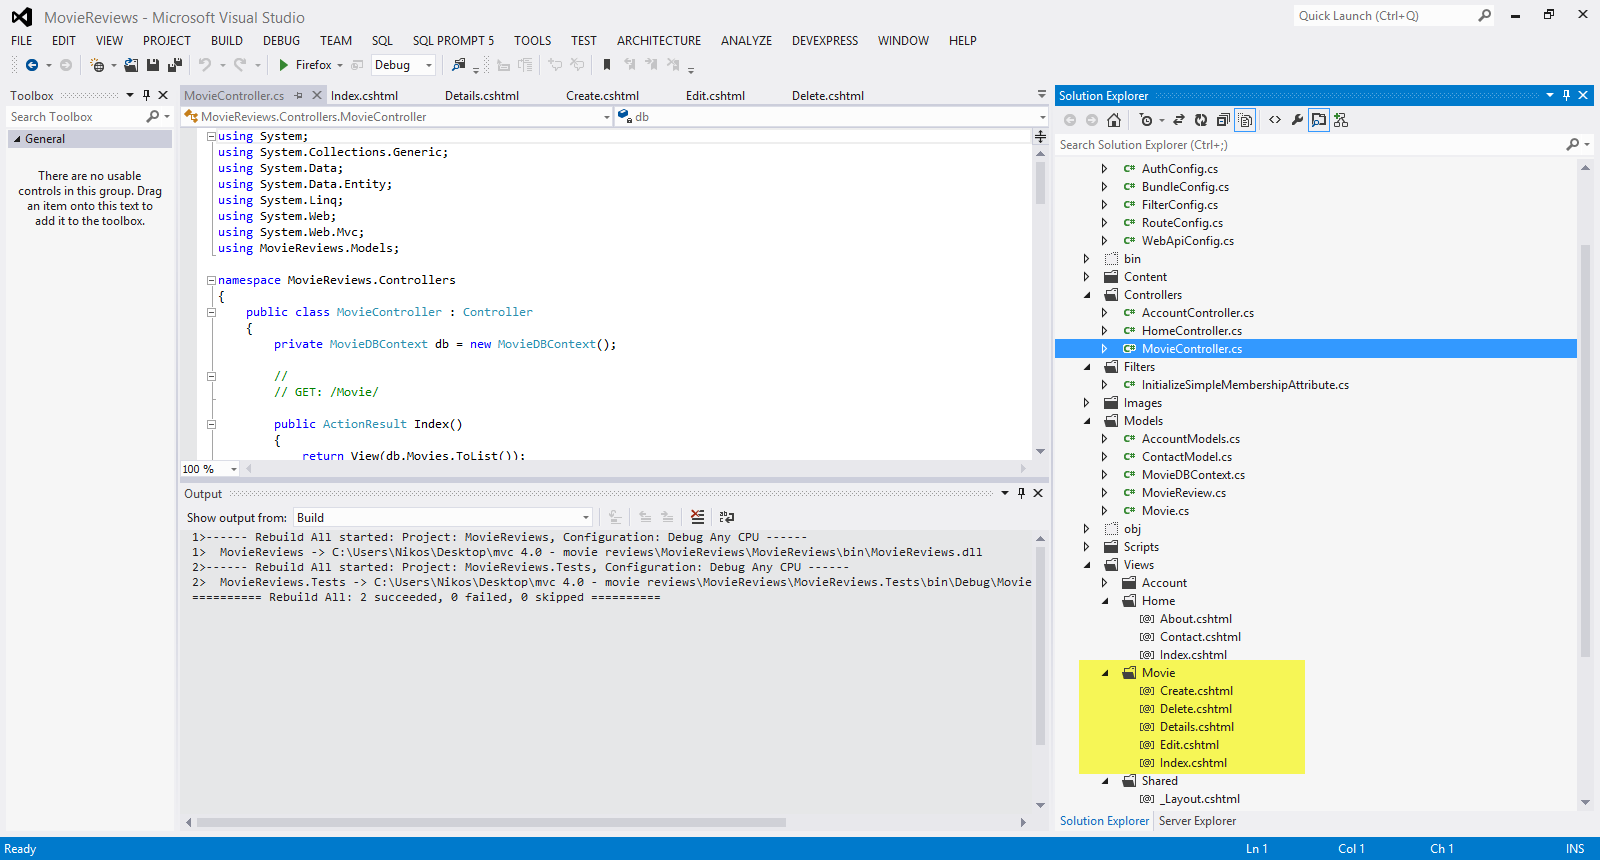
Visual Studio will create the following
A MovieController.cs file in the project's Controllers folder.
A Movie folder in the project's Views folder.
Create.cshtml, Delete.cshtml, Details.cshtml, Edit.cshtml, and Index.cshtml in the new Views\Footballer folder.
Have a look at the picture below
The
ASP.NET MVC 4 framework automatically creates the CRUD (create, read,
update, and delete) action methods and views.This is know as
scaffolding. We have a fully functional web application that lets you
create, list, edit, and delete records.
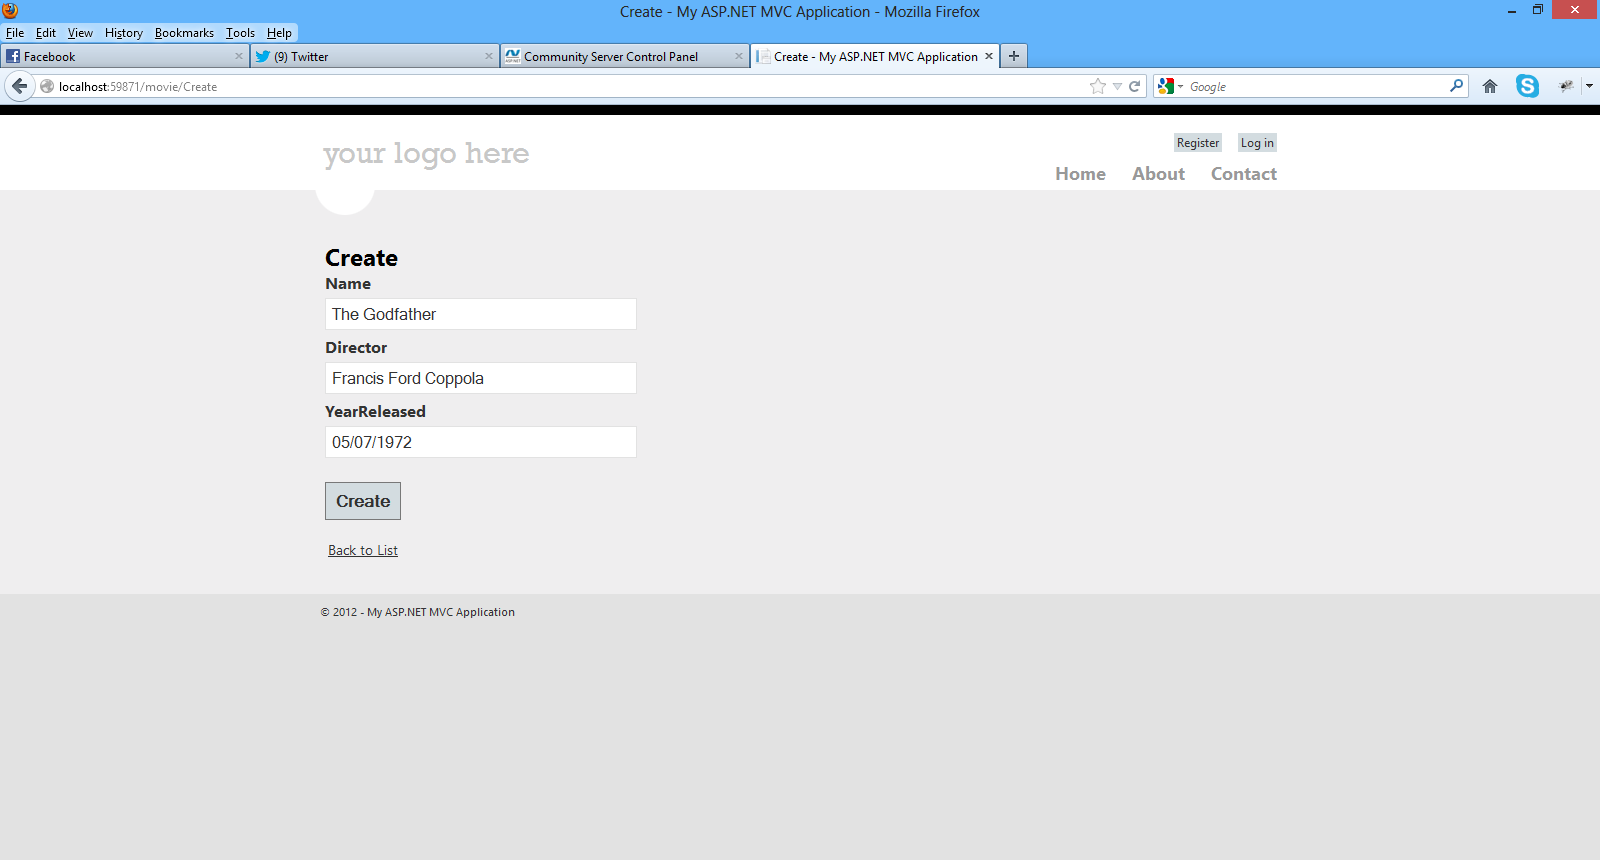
4) Build and run your application.Navigate to the localhost/youport/movie
Have a look at the picture below
I will create two entries for two of my favorite movies
I click on the Create New link and insert the data.Finally I click Create.The data is saved in the database.
I know exactly what you are thinking right now. You did not create any database.
Entity Framework Code First created the database for us. EF detected that the database connection string provided, pointing to a database didn’t exist, so Code First created the database automatically.
Have a look at the picture below
Make sure you add your entries to the database through the view.
We have created two new records and stored it in the database.Click the Edit,Details and Delete links.We have all this functionality out of the box through the magic of scaffolding.
I urge you to have a look (place breakpoints as well) in the MovieController.cs class file and notice the flow of the execution.
We pass a strongly typed object (Movie) to the various views.
Have a look again in the views inside the Views/Movie folder.
In the Create.cshtml, Delete.cshtml, Details.cshtml, Edit.cshtml, and Index.cshtml Views , at the beginning of these files, you will see this line of code.
@model MovieReviews.Models.Μovie
By adding a @model statement at the top of the view file, we tell the view the type of object that the view should render.
This is how we pass a model through a controller to the appropriate view.I am sure you can clearly see the separation of concerns.
5) Now we can see our database and the data that was saved. We go to View->Server Explorer or Database Explorer and connect to the instance of SQL Server
Have a a look at the picture below to see what I mean.Click OK
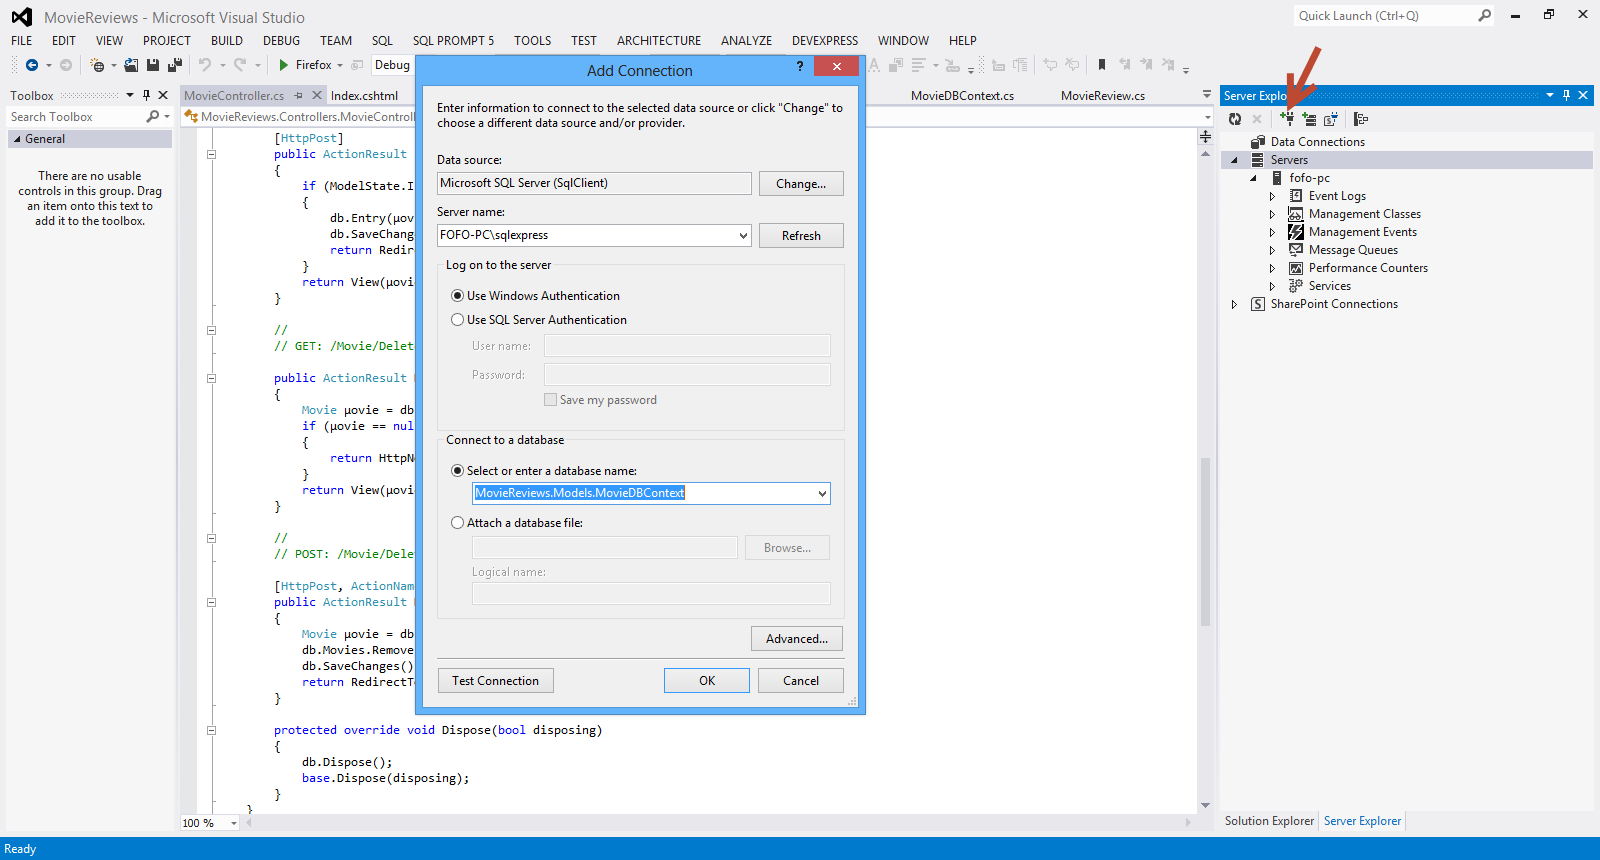
Have a look at the picture below to see the database and the tables

Now I can see the data that was inserted through my ASP.Net MVC application to the database.

I am sure you know have a feeling about the application we are about to build. I will explain more about ASP.Net MVC as we go on building the application
Hope it helps!!!

I have decided to write a series of posts on how to write a small ASP.Net MVC 4.0 application.I will develop this application step by step and I will explain everything that you need to know in order to develop ASP.Net MVC 4.0 applications. This is the second posts in this series. You can find the first one here. Make sure you read and understand the first post.
In this post I would like to look into the internals of ASP.Net MVC and what happens when an incoming HTTP request comes in from the browser. Bear in mind that the local web server is IIS Express .This is the web server that will handle the incoming request.IIS Express will take that request and deliver it to my application.Let's run our application again and click on the Contact link on the top right hand corner of the page. When I click that link the URL in my browser becomes http://localhost:59871/Home/Contact. As mentioned earlier the local web server will take this request and deliver it to my ASP.Net MVC application.Inside the ASP.Net MVC application there is a Routing Engine that takes requests and delivers them to the proper component. In this case the request will end up in the HomeController.cs class file. Remember that the Controller is the component in the MVC pattern that orchestrates everything.
A request for /Home/Something will always come to the HomeController.cs class.A request (in our case) http://localhost:59871/Home/Contact, will end up in the Contact method inside the HomeController.cs class file.
Have a look at the picture below

I am sure you can see the naming conventions applied here.This action method public ActionResult Contact() does not do anything else but to return a View.No Model is build on this occasion.So how can we reach the appropriate view to display? There are more naming conventions. Τhe ASP.Net MVC application will look in the Views Folder and then in the Home folder.The name Home matches the name of the Home controller and then it will pick the Contact.cshtml.Inside this view there is all the markup that is rendered by the browser.
Have a look at the picture below
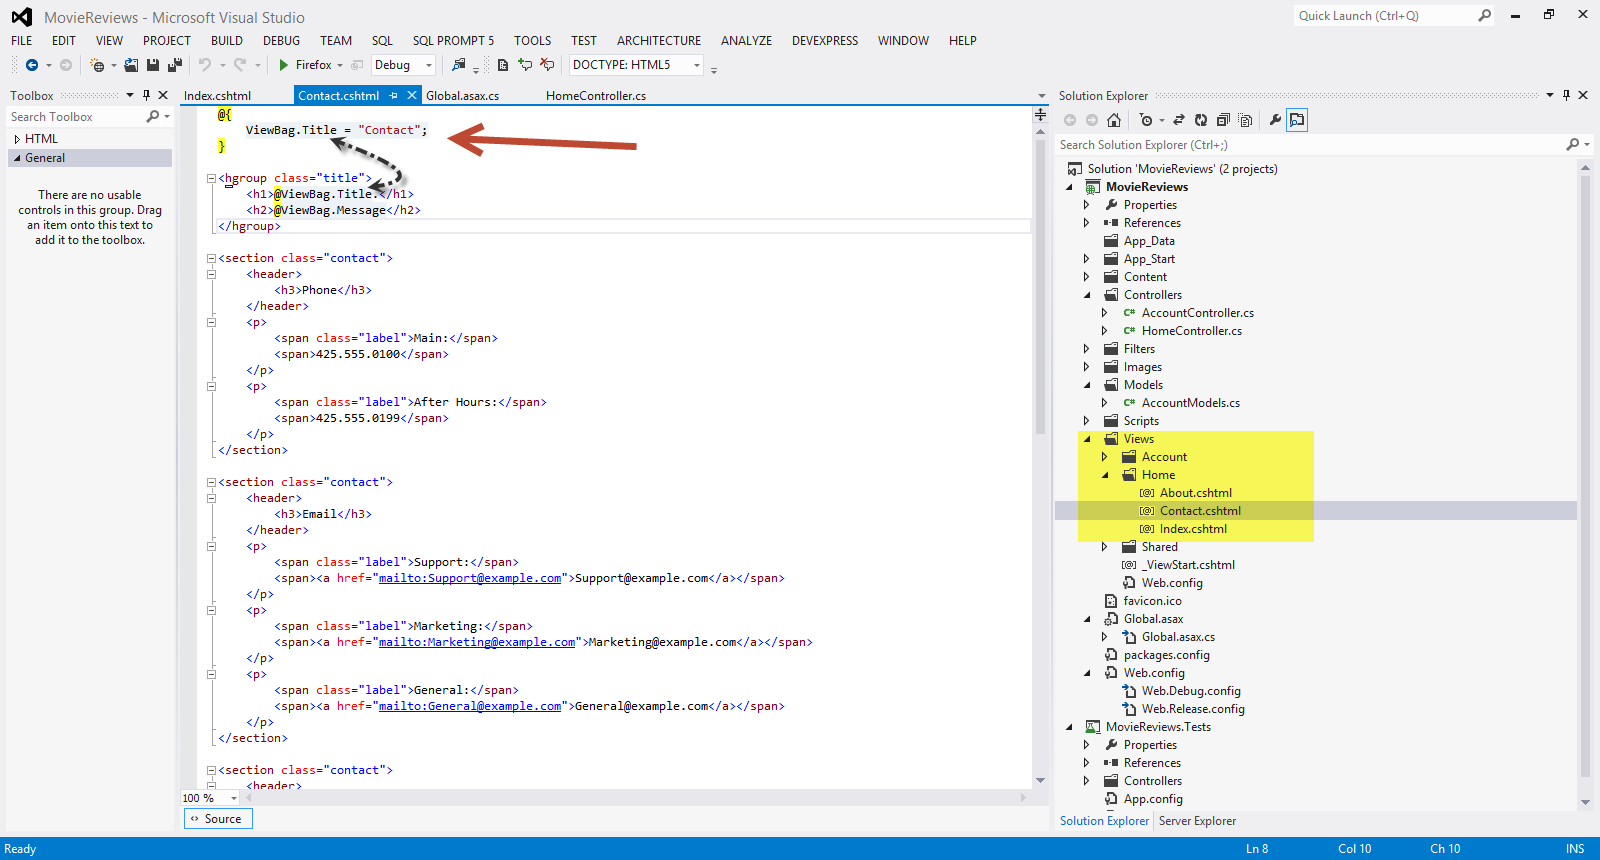
I would like to explain a bit more the ViewBag property.
The ViewBag allows data to be added to it which is then
available in the View.It is similar to how a session variable works, when
you assign a value to a ViewBag property, such as ViewBag.
Have a look at the HomeController.cs file and the Contact method. It passes the ViewBag.Message = "Your contact page."; to the Contact View.
Open the Contact.cshtml file in the Solution Explorer
<hgroup class="title">
<h1>@ViewBag.Title.</h1>
<h2>@ViewBag.Message</h2>
</hgroup>
As you can see in the bold line above, this is the way we get the contents of the ViewBag.Message in the our view.
Let's add another ViewBag property
Have a look at the code below
public ActionResult Contact()
{
ViewBag.Message = "Your contact page.";
ViewBag.AdminEmail = "[email protected]";
return View();
}
I have added ViewBag.AdminEmail to the Contact method. Now I am going to retrieve the value inside the ViewBag.AdminEmail from the Contact.cshtml view.
<p>
<span class="label">WebMaster:</span>
<span><a href="mailto:@ViewBag.AdminEmail">@ViewBag.AdminEmail</a></span>
</p>
Obviously this is not the best way to pass data from our controller to the View. Let's add a model to our application. In the Models folder add a new class file and name it ContactModel.cs
The contents of this class follow
namespace MovieReviews.Models
{
public class ContactModel
{
public string Name { get; set; }
public string Surname { get; set; }
public string Email { get; set; }
}
}
I add three properties in my class. Now I need to change the code inside the Contact method in the HomeController.cs class
This is how Contact method looks now.
public ActionResult Contact()
{
//ViewBag.Message = "Your contact page.";
//ViewBag.AdminEmail = "[email protected]";
var contact = new ContactModel();
contact.Name = "Nick";
contact.Surname = "kantzelis";
contact.Email = "[email protected]";
return View(contact);
}
With this line of code return View(contact); ,we say that we want to pass this model-contact to the appropriate View.
We need to modify the Contact.cshtml view
<p>
<span class="label">Name:@Model.Name</span><br />
<span class="label">Surname:@Model.Surname</span><br />
<span class="label">Email:@Model.Email</span>
</p>
We use the @Model property (represents the model object - ContactModel object passed to the view ). This is a strongly typed property as opposed to the ViewBag.
In the beginning of the Contact.cshtml we must add this line of code.
@model MovieReviews.Models.ContactModel
By this line of code I inform the View about the model and what kind of model (ContactModel object) it has.
The razor engine now knows how to display this information to the user. We just have to place the @Model property in the appropriate place in the View.
Now when I run the application I see the following results.

Hope all makes sense now.I mean how the MVC pattern works and what the Controller, Model and the View do.
I know that we have not build the actual application yet. We will do that step by step in the next posts but it is of vital significance to understand the basic components of the MVC pattern and its internals.
Hope it helps!!

I have been using ASP.Net MVC, Visual Studio, C# , Entity Framework, JQuery, CSS to build web sites and applications. I have been teaching ASP.Net MVC to people from all walks of life with different experience in Web development. I have decided to write a series of posts on how to write a small ASP.Net MVC 4.0 application.I will develop this application step by step and I will explain everything that you need to know in order to develop ASP.Net MVC 4.0 applications.
There are some other posts in my blog, regarding ASP.Net MVC. You can find them here, here . Please have a look at those posts to get a feeling for ASP.Net MVC.I will repeat some of the content found in those posts in the posts that will be part of this series. If you are an experienced ASP.NET MVC developer, maybe you mus go on and read something more advanced. I will talk about advanced things later on though.This series is aimed at developers that start learning ASP.Net MVC.I assume that you have some working knowledge of HTML,CSS. It will be great if you programmed before with C# or used Visual Studio.Αs I said earlier I will try to explain everything in detail so beginners can benefit from that.
I am going to build a web application where users can post reviews about movies. The user can list the reviews,edit the reviews and obviously create a review. The administrator will be able to post movies so other users can review it.Users can also search for movies to review. This is the general overview of the application.
I will explain more about the application as we move on. I will also show you how to deploy the application to IIS and Windows Azure towards the end.
The most important thing right now is to download and install all the tools,libary,software in your computer so you can follow along. You can download all the necessary software (tools-Visual Studio 2012 Web Edition along with a web server- , a Sql Server instance, libraries,binaries) if you download Web Platform Installer.You can download this tool from this link.
After you install it, you must search for Visual Studio Express 2012 for Web
Have a look at the picture below

Then click Add and then Install.Everything you need will be installed. Maybe you need to reboot the machine so do not worry if you will have to do this.
So now you have an IDE, Visual Studio 2012 that you can write, test and debug your code. SQL Server is also installed. We need SQL Server to persist our data back to the database. A lightweight web server IIS Express is also installed so it can execute (host our web application) our code during development.
I have installed Visual Studio 2012 Ultimate edition in my machine which is Windows 8 by the way. I have also installed the latest version of .Net Framework and I will show you later how to download more libraries when needed.I have installed SQL Server 2012 Enterprise Edition in my machine. As a Microsoft Certified Trainer I have access to this software but as explained earlier you need only to download Web Platform Installer and then download the Visual Studio Express 2012 for Web and install it.
Before we move on to the actual hands-on demo I would like to say a few words on how I understand ASP.Net MVC and what its main benefits/design goals are.
Obviously the first paradigm on bulding web applications on the web is Web Forms.
Web forms was the first and only way to build web application when ASP.Net was introduced to the world, ten years ago.
It replaced the classic ASP model by providing us with a strongly typed code that replaced scripting.We had/have languages that are compiled.Web forms feels like a form that you programmed with VB 6.0 for the desktop.
The main idea was to abstract the WEB.By that I mean HTML is abstracted in a way.Click events replaced "Post" operations.Since that time, web standards have strengthened and client side programming is on the rise. Developers wanted to have more control on the HTML.Web forms , as I said before handles HTML in an abstract way and is not the best paradigm for allowing full control on the HTML rendering.
ASP.Net MVC provide us with a new way of writing ASP.Net applications.It does not replace Web Forms. It is just an alternative project type.It still runs on ASP.Net and supports caching, sesions and master pages.In ASP.Net MVC applications we have no viewstate or page lifecycle. For more information on understanding the MVC application execution process have a look at this link .It is a highly extensible and testable model.
In order to see what features of ASP.Net are compatible in both Models have a look here.
MVC pattern has been around for decades and it has been used across many technologies as a design pattern to use when building UI. It is based on an architecture model that embraces the so called "seperation of concern pattern".
There are three main building blocks in the MVC pattern. The View talks to the Model. The Model has the data that the View needs to display.The View does not have much logic in them at all.
The Controller orchestrates everything.When we have an HTTP request coming in, that request is routed to the Controller . It is up to the Controller to talk to the file system,database and build the model.The routing mechanism in MVC is implemented through the System.Web.Routing assembly. Routes are defined during application startup.Have a look at the Global.asax file,when building an MVC application.
The Controller will select which View to use to display the Model to the client.It is clear that we have now a model that fully supports "seperation of concerns".The Controller is responsible for building the Model and selecting the View.
The Controller does not save any data or state. The Model is responsible for that.The Controller selects the View but has nothing to do with displaying data to the client.This is the View's job.
The Controller component is basically a class file that we can write VB.Net or C# code. We do not have Page_Load event handler routines, just simple methods which are easy to test.No code behind files are associated with the Controller classes.All these classes should be under the Controllers folder in your application.Controller type name must end with Controller (e.g ProductController).
In the Views folder we should place the files responsible for displaying content to the client.Create subfolders for every Controller. Shared folder contains views used by multiple controllers.
In this post I will use the Razor View engine rather than the WebForms View. Razor View engine is designed with MVC in mind and it is the way (as far as I am concerned) to work with ASP.Net MVC.
ASP.Net MVC does not dictate what kind of data access architecture we will use in our application. It does not also dictate how to build our business layer (domain classes and objects).
Finally ASP.Net MVC is very extensible and easy to test
Let's start building our web application
1) I am launching VS 2012 and I will Visual C# as the programming language. I will also select ASP.NET MVC 4 Web Application from the available templates.Have a look at the picture below
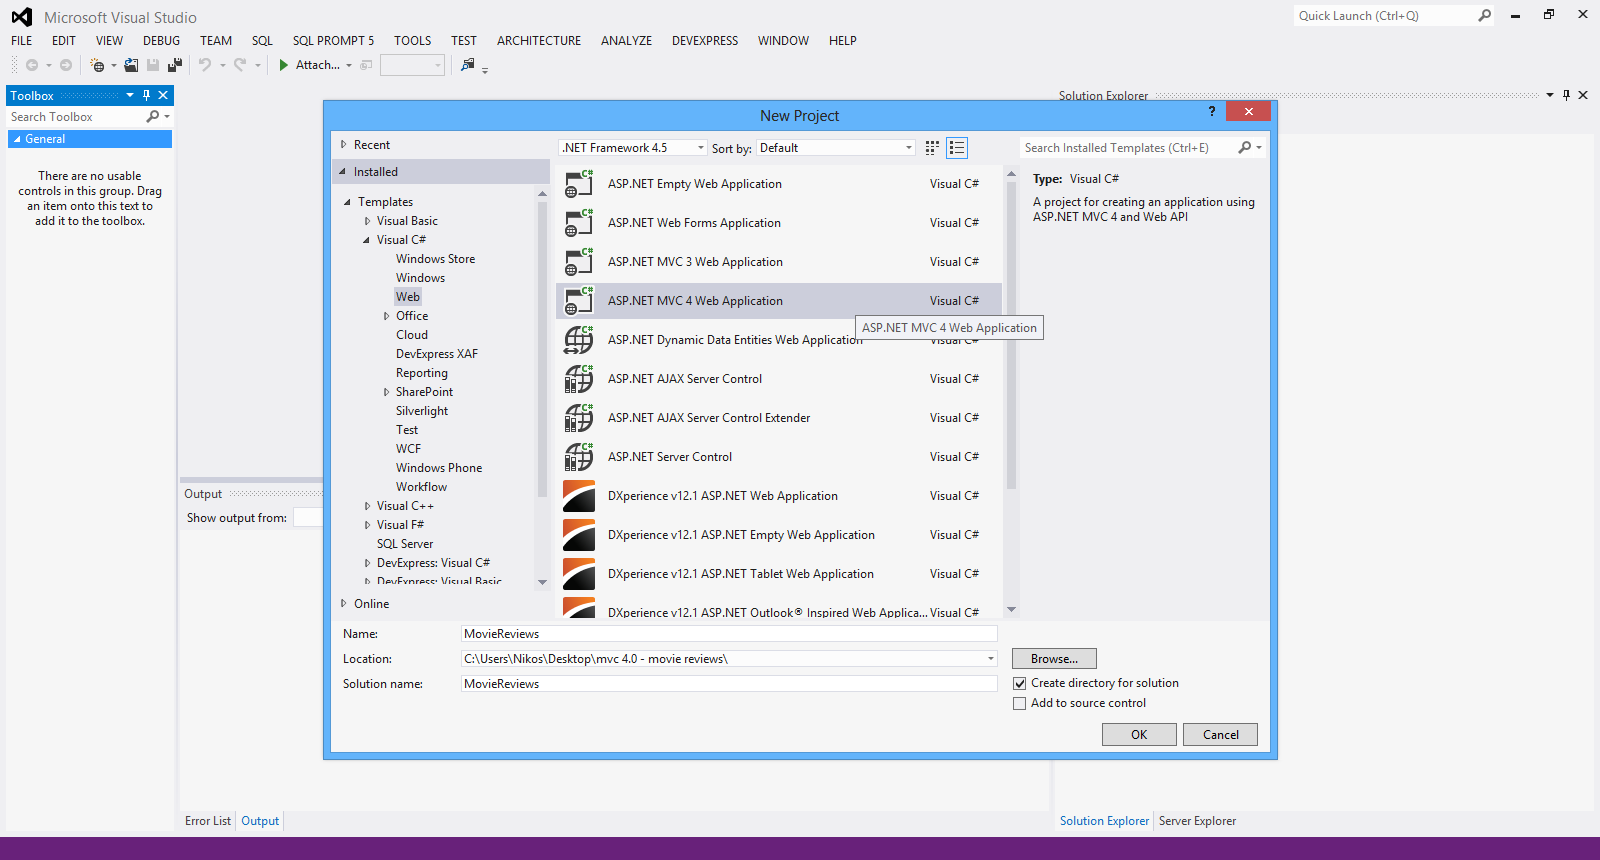
I have named my application "MovieReviews" and then clicked OK.
2) From the available templates in the next screen I select Internet Application. This template will create all the necessary files in order to build the application. Click OK.
Have a look at the picture below.

3) Have a look at the Solution Explorer to get a feeling of the files being created and the structure of the web application. Have a look at the picture below

4) Now we can build and run the application. You can do that by pressing F5 in the Visual Studio IDE. Have a look at the picture below to see the homepage of the web application

Now we can right-click (View->Page Source) to see the pure HTML 5 code. Have a look at the picture below
You can also see that there is ViewPort meta tag and this is very important for mobile devices.With this tag we tell the mobile browser that our site will adapt to the width of the device.
There also links to Javascript and CSS files. There is a link to the modernizer library.This Javascript library makes sure our site works with older browsers before HTML 5 existed.
So far we have talked about MVC pattern. We have talked about the application we want to build. I have explained what kind of tools we need and how to get them. Finally we have created our sample ASP.Net MVC application. The template we have chosen (Internet Application) provides us with all the necessary files in order to have a working ASP.Net MVC application out of the box.
Hope it helps !!!

In this post I would like to talk a bit about Transaction Log ,its various parts and its architecture. I will not go into details about what Transaction Log is because it is well documented elsewhere. I would like also to highlight a few important points.
Διαβάστε περισσότερα
In this post I will be looking into a great feature in CSS3 called multiple backgrounds.With CSS3 ourselves as web designers we can specify multiple background images for box
elements, using nothing more than a simple comma-separated list.
This is a very nice feature that can be useful in many websites.
In this hands-on example I will be using Expression Web 4.0.This application is not a free application. You can use any HTML editor you like.You can use Visual Studio 2012 Express edition. You can download it here.
Before I go on with the actual demo I will use the (http://www.caniuse.com) to see the support for CSS 3 Multiple backgrounds from the latest versions of modern browsers.
Please have a look in this link
All modern browsers support this feature. I am typing this very simple HTML 5 markup with an internal CSS style.
<!DOCTYPE html>
<html lang="en">
<head>
<title>Sold items</title>
<style>
#box{
border:1px solid #afafaf;
width:260px;
height:290px;
background-image:url(shirt.png), url(sold.jpg);
background-position: center bottom, right top;
background-repeat: no-repeat, no-repeat;
</style>
</head>
<body>
<header>
<h1>CSS3 Multiple backgrounds</h1>
</header>
<div id="box">
</div>
<footer>
<p>All Rights Reserved</p>
</footer>
</body>
</html>
Let me explain what I do here, multiple background images are specified using a comma-separated list of values for the background-image property.
A comma separated list is also used for the other background properties such as background-repeat, background-position .
So in the next three lines of CSS code
background-image:url(shirt.png), url(sold.jpg);
background-position: center bottom, right top;
background-repeat: no-repeat, no-repeat;
we have 2 images placed in the div element. The first is placed center bottom in the div element and the second is placed at right top position inside the div element.Both images do not get repeated.
I view the page in IE 10 and all the latest versions of Opera,Chrome and Firefox.
Have a look at the picture below.

Hope it helps!!!!

I
have been using JQuery for a couple of years now and it has helped me
to solve many problems on the client side of web development.
You can find all my posts about JQuery in this link. In this post I will be providing you with a hands-on example on the JQuery LazyLoad Plugin.If you want you can have a look at this post, where I describe the JQuery Cycle Plugin.You can find another post of mine talking about the JQuery Carousel Lite Plugin here. Another post of mine regarding the JQuery Image Zoom Plugin can be found here. You can have a look at the JQuery Overlays Plugin here .
There are times when when I am asked to create a very long page with lots of images.My first thought is to enable paging on the proposed page. Imagine that we have 60 images on a page. There are performance concerns when we have so many images on a page. Paging can solve that problem if I am allowed to place only 5 images on a page.Sometimes the customer does not like the idea of the paging.Believe it or not some people find the idea of paging not attractive at all.
In that case I need a way to only load the initial set of images and as the user scrolls down the page to load the rest.So as someone scrolls down new requests are made to the server and more images are fetched.
I can accomplish that with the jQuery LazyLoad Plugin.This is just a plugin that delays loading of images in long web pages.
The images that are outside of the viewport (visible part of web page) won't be loaded before the user scrolls to them.
Using jQuery LazyLoad Plugin on long web pages containing many large images makes the page load faster.
In
this hands-on example I will be using Expression Web 4.0.This
application is not a free application. You can use any HTML editor you
like.
You can use Visual Studio 2012 Express edition. You can download it here.
You can download this plugin from this link.
I launch Expression Web 4.0 and then I type the following HTML markup (I am using HTML 5)
<!DOCTYPE html>
<html lang="en">
<head>
<title>Liverpool Legends</title>
<script type="text/javascript" src="jquery-1.8.3.min.js"></script>
<script type="text/javascript" src="jquery.lazyload.min.js" ></script>
</head>
<body>
<header>
<h1>Liverpool Legends</h1>
</header>
<div id="main">
<img src="barnes.JPG" width="800" height="1100" /><p />
<img src="dalglish.JPG" width="800" height="1100" /><p />
<img class="LiverpoolImage" src="loader.gif" data-original="fans.JPG" width="1200" height="900" /><p />
<img class="LiverpoolImage" src="loader.gif" data-original="lfc.JPG" width="1000" height="700" /><p />
<img class="LiverpoolImage" src="loader.gif" data-original="Liverpool-players.JPG" width="1100" height="900" /><p />
<img class="LiverpoolImage" src="loader.gif" data-original="steven_gerrard.JPG" width="1110" height="1000" /><p />
<img class="LiverpoolImage" src="loader.gif" data-original="robbie.JPG" width="1200" height="1000" /><p />
</div>
<footer>
<p>All Rights Reserved</p>
</footer>
<script type="text/javascript">
$(function () {
$("img.LiverpoolImage").lazyload();
});
</script>
</body>
</html>
This is a very simple markup. I have added references to the JQuery library (current version is 1.8.3) and the JQuery LazyLoad Plugin.
Firstly, I add two images
<img src="barnes.JPG" width="800" height="1100" /><p />
<img src="dalglish.JPG" width="800" height="1100" /><p />
that will load immediately as soon as the page loads.
Then I add the images that will not load unless they become active in the viewport. I have all my img tags pointing the src attribute towards a placeholder image. I’m using a blank 1×1 px grey image,loader.gif.
The five images that will load as the user scrolls down the page follow.
<img class="LiverpoolImage" src="loader.gif" data-original="fans.JPG" width="1200" height="900" /><p />
<img class="LiverpoolImage" src="loader.gif" data-original="lfc.JPG" width="1000" height="700" /><p />
<img class="LiverpoolImage" src="loader.gif"
data-original="Liverpool-players.JPG" width="1100" height="900"
/><p />
<img class="LiverpoolImage" src="loader.gif" data-original="steven_gerrard.JPG" width="1110"
height="1000" /><p />
<img class="LiverpoolImage" src="loader.gif" data-original="robbie.JPG" width="1200" height="1000" /><p />
Then we need to rename the image src to point towards the proper image placeholder. The full image URL goes into the data-original attribute.
The Javascript code that makes it all happen follows. We need to make a call to the JQuery LazyLoad Plugin. We add the script just before we close the body element.
<script type="text/javascript">
$(function () {
$("img.LiverpoolImage").lazyload();
});
</script>
We can change the code above to incorporate some effects.
<script type="text/javascript">
$("img.LiverpoolImage").lazyload({
effect: "fadeIn"
});
</script>
That is all I need to write to achieve lazy loading. It it true that you can do so much with less!!
I view my simple page in Internet Explorer 10 and it works as expected.
I have tested this simple solution in all major browsers and it works fine.
You can test it yourself and see the results in your favorite browser.
Hope it helps!!!

I
have been using JQuery for a couple of years now and it has helped me
to solve many problems on the client side of web development.
You can find all my posts about JQuery in this link. In this post I will be providing you with a hands-on example on the JQuery Overlays Plugin.If you want you can have a look at this post, where I describe the JQuery Cycle Plugin.You can find another post of mine talking about the JQuery Carousel Lite Plugin here. Another post of mine regarding the JQuery Image Zoom Plugin can be found here.
I will be writing more posts regarding the most commonly used JQuery Plugins.
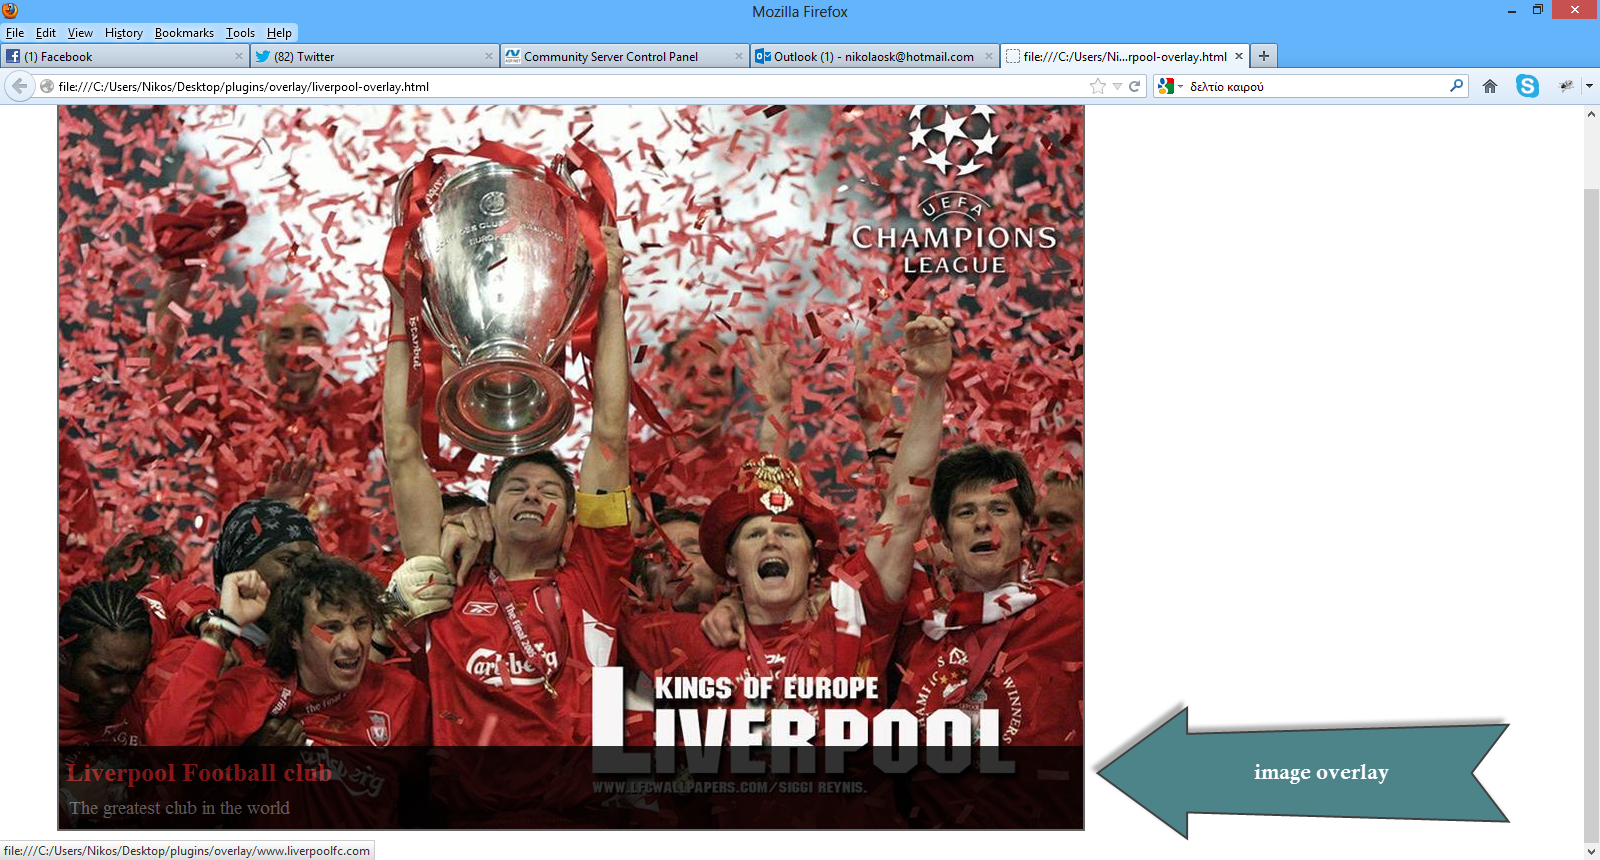
With the JQuery Overlays Plugin we can provide the user (overlay) with more information about an image when the user hovers over the image.
I
have been using extensively this plugin in my websites.
In
this hands-on example I will be using Expression Web 4.0.This
application is not a free application. You can use any HTML editor you
like.
You can use Visual Studio 2012 Express edition. You can download it here.
You can download this plugin from this link.
I launch Expression Web 4.0 and then I type the following HTML markup (I am using HTML 5)
<html lang="en">
<head>
<link rel="stylesheet" href="ImageOverlay.css" type="text/css" media="screen" />
<script type="text/javascript" src="jquery-1.8.3.min.js"></script>
<script type="text/javascript" src="jquery.ImageOverlay.min.js"></script>
<script type="text/javascript">
$(function () {
$("#Liverpool").ImageOverlay();
});
</script>
</head>
<body>
<ul id="Liverpool" class="image-overlay">
<li>
<a href="www.liverpoolfc.com">
<img alt="Liverpool" src="championsofeurope.jpg" />
<div class="caption">
<h3>Liverpool Football club</h3>
<p>The greatest club in the world</p>
</div>
</a>
</li>
</ul>
</body>
</html>
This is a very simple markup.
I have added references to the JQuery library (current version is 1.8.3) and the JQuery Overlays Plugin. Then I add 1 image in the element with "id=Liverpool". There is a caption class as well, where I place the text I want to show when the mouse hovers over the image. The caption class and the Liverpool id element are styled in the ImageOverlay.css file that can also be downloaded with the plugin.You can style the various elements of the html markup in the .css file.
The Javascript code that makes it all happen follows.
<script type="text/javascript">
$(function () {
$("#Liverpool").ImageOverlay();
});
</script>
I am just calling the ImageOverlay function for the Liverpool ID element.
The contents of ImageOverlay.css file follow.Feel free to change this file.
.image-overlay { list-style: none; text-align: left; }
.image-overlay li { display: inline; }
.image-overlay a:link, .image-overlay a:visited, .image-overlay a:hover, .image-overlay a:active { text-decoration: none; }
.image-overlay a:link img, .image-overlay a:visited img, .image-overlay a:hover img, .image-overlay a:active img { border: none; }
.image-overlay a
{
margin: 9px;
float: left;
background: #fff;
border: solid 2px;
overflow: hidden;
position: relative;
}
.image-overlay img
{
position: absolute;
top: 0;
left: 0;
border: 0;
}
.image-overlay .caption
{
float: left;
position: absolute;
background-color: #000;
width: 100%;
cursor: pointer;
/* The way to change overlay opacity is the follow properties. Opacity is a tricky issue due to
longtime IE abuse of it, so opacity is not offically supported - use at your own risk.
To play it safe, disable overlay opacity in IE. */
/* For Firefox/Opera/Safari/Chrome */
opacity: .8;
/* For IE 5-7 */
filter: progid:DXImageTransform.Microsoft.Alpha(Opacity=80);
/* For IE 8 */
-MS-filter: "progid:DXImageTransform.Microsoft.Alpha(Opacity=80)";
}
.image-overlay .caption h1, .image-overlay .caption h2, .image-overlay .caption h3,
.image-overlay .caption h4, .image-overlay .caption h5, .image-overlay .caption h6
{
margin: 10px 0 10px 2px;
font-size: 26px;
font-weight: bold;
padding: 0 0 0 5px;
color:#92171a;
}
.image-overlay p
{
text-indent: 0;
margin: 10px;
font-size: 1.2em;
}
It couldn't be any simpler than that. I view my simple page in Internet Explorer 10 and it works as expected.
I have tested this simple solution in all major browsers and it works fine.
Have
a look at the picture below.
You can test it yourself and see the results in your favorite browser.
Hope it helps!!!

I have been using JQuery for a couple of years now and it has helped me to solve many problems on the client side of web development.
You can find all my posts about JQuery in this link. In this post I will be providing you with a hands-on example on the JQuery Image Zoom Plugin.If you want you can have a look at this post, where I describe the JQuery Cycle Plugin.You can find another post of mine talking about the JQuery Carousel Lite Plugin here.
I will be writing more posts regarding the most commonly used JQuery Plugins.
I have been using extensively this plugin in my websites.You can use this plugin to move mouse around an image and see a zoomed in version of a portion of it.
In this hands-on example I will be using Expression Web 4.0.This application is not a free application. You can use any HTML editor you like.
You can use Visual Studio 2012 Express edition. You can download it here.
You can download this plugin from this link
I launch Expression Web 4.0 and then I type the following HTML markup (I am using HTML 5)
<html lang="en">
<head>
<title>Liverpool Legends</title>
<meta http-equiv="Content-Type" content="text/html;charset=utf-8" >
<link rel="stylesheet" type="text/css" href="style.css">
<script type="text/javascript" src="jquery-1.8.3.min.js"> </script>
<script type="text/javascript" src="jqzoom.pack.1.0.1.js"></script>
<script type="text/javascript">
$(function () {
$(".nicezoom").jqzoom();
});
</script>
</head>
<body>
<header>
<h1>Liverpool Legends</h1>
</header>
<div id="main">
<a href="championsofeurope-large.jpg" class="nicezoom" title="Champions">
<img src="championsofeurope.jpg" title="Champions">
</a>
</div>
<footer>
<p>All Rights Reserved</p>
</footer>
</body>
</html>
This is a very simple markup. I have added one large and one small image (make sure you use your own when trying this example)
I have added references to the JQuery library (current version is 1.8.3) and the JQuery Image Zoom Plugin. Then I add 2 images in the main div element.Note the class nicezoom inside the href element.
The Javascript code that makes it all happen follows.
<script type="text/javascript">
$(function () {
$(".nicezoom").jqzoom();
});
</script> It couldn't be any simpler than that. I view my simple in Internet Explorer 10 and it works as expected.
I have tested this simple solution in all major browsers and it works fine.
Inside the head section we can add another Javascript script utilising some more options regarding the zoom plugin.
<script type="text/javascript">
$(function () {
var options = {
zoomType: 'standard',
lens:true,
preloadImages: true,
alwaysOn:false,
zoomWidth: 400,
zoomHeight: 350,
xOffset:190,
yOffset:80,
position:'right'
};
$('.nicezoom').jqzoom(options);
});
</script>
I would like to explain briefly what some of those options mean.
-
zoomType - Other admitted option values are 'reverse','drag','innerzoom'
-
zoomWidth - The popup window width showing the zoomed area
-
zoomHeight - The popup window height showing the zoomed area
-
xOffset - The popup window x offset from the small image.
-
yOffset - The popup window y offset from the small image.
-
position - The popup window position.Admitted values:'right' ,'left' ,'top' ,'bottom'
-
preloadImages - if set to true,jqzoom will preload large images.
You can test it yourself and see the results in your favorite browser.
Hope it helps!!!

I have been using JQuery for a couple of years now and it has helped me to solve many problems on the client side of web development.
You can find all my posts about JQuery in this link. In this post I will be providing you with a hands-on example on the JQuery Carousel Lite Plugin.If you want you can have a look at this post, where I describe the JQuery Cycle Plugin. I will be writing more posts regarding the most commonly used JQuery Plugins.
I have been using extensively this plugin in my websites.You can show a portion of a set of images with previous and next navigation.
In this hands-on example I will be using Expression Web 4.0.This application is not a free application. You can use any HTML editor you like.
You can use Visual Studio 2012 Express edition. You can download it here.
You can download this plugin from this link
I launch Expression Web 4.0 and then I type the following HTML markup (I am using HTML 5)
<html lang="en">
<head>
<title>Liverpool Legends</title>
<meta http-equiv="Content-Type" content="text/html;charset=utf-8" >
<link rel="stylesheet" type="text/css" href="style.css">
<script type="text/javascript" src="jquery-1.8.3.min.js"> </script>
<script type="text/javascript" src="jcarousellite_1.0.1.min.js"></script>
<script type="text/javascript">
$(function () {
$(".theImages").jCarouselLite({
btnNext: "#Nextbtn",
btnPrev: "#Previousbtn"
});
});
</script>
</head>
<body>
<header>
<h1>Liverpool Legends</h1>
</header>
<div id="main">
<img id="Previousbtn" src="previous.png" />
<div class="theImages">
<ul>
<li><img src="championsofeurope.jpg"></li>
<li><img src="steven_gerrard.jpg"></li>
<li><img src="ynwa.jpg"></li>
<li><img src="dalglish.jpg"></li>
<li><img src="Souness.jpg"></li>
</ul>
</div>
<img id="Nextbtn" src="next.png" />
</div>
<footer>
<p>All Rights Reserved</p>
</footer>
</body>
</html>
This is a very simple markup. I have added my photos (make sure you use your own when trying this example)
I have added references to the JQuery library (current version is 1.8.3) and the JQuery Carousel Lite Plugin. Then I add 5 images in the theImages div element.
The Javascript code that makes it all happen follows.
<script type="text/javascript">
$(function () {
$(".theImages").jCarouselLite({
btnNext: "#Nextbtn",
btnPrev: "#Previousbtn"
});
});
</script>
I also have added some basic CSS style rules in the style.css file.
body{
background-color:#efefef;
color:#791d22;
}
#Previousbtn{position:absolute; left:5px; top:100px;}
#Nextbtn {position:absolute; left:812px; top:100px;}
.theImages {margin-left:145px;margin-top:10px;}
It couldn't be any simpler than that. I view my simple in Internet Explorer 10 and it works as expected.
I have tested this simple solution in all major browsers and it works fine.
Hope it helps!!!

I have been using JQuery for a couple of years now and it has helped me to solve many problems on the client.
You can find all my posts about JQuery in this link. In this post I will be providing you with a hands-on example on the JQuery Cycle Plugin.
I have been using extensively this plugin in my websites.You can rotate a series of images using various transitions with this plugin.It is a slideshow type of experience.
I will be writing more posts regarding the most commonly used JQuery Plugins.
In this hands-on example I will be using Expression Web 4.0.This application is not a free application. You can use any HTML editor you like.
You can use Visual Studio 2012 Express edition. You can download it here.
You can download this plugin from this link
I launch Expression Web 4.0 and then I type the following HTML markup (I am using HTML 5)
<!DOCTYPE html>
<html lang="en">
<head>
<title>Liverpool Legends</title>
<meta http-equiv="Content-Type" content="text/html;charset=utf-8" >
<script type="text/javascript" src="jquery-1.8.3.min.js"> </script>
<script type="text/javascript" src="jquery.cycle.all.js"></script>
<script type="text/javascript">
$(function() {
$('#main').cycle({ fx: 'fade'});
});
</script>
</head>
<body>
<header>
<h1>Liverpool Legends</h1>
</header>
<div id="main">
<img src="championsofeurope.jpg" alt="Champions of Europe">
<img src="steven_gerrard.jpg" alt="Steven Gerrard">
<img src="ynwa.jpg" alt="You will never walk alone">
</div>
<footer>
<p>All Rights Reserved</p>
</footer>
</body>
</html>
This is a very simple markup. I have added three photos (make sure you use your own when trying this example)
I have added references to the JQuery library (current version is 1.8.3) and the JQuery Cycle Plugin. Then I have added 3 images in the main div element.
The Javascript code that makes it all happen follows.
<script type="text/javascript">
$(function() {
$('#main').cycle({ fx: 'fade'});
});
</script>
It couldn't be any simpler than that. I view my simple in Internet Explorer 10 and it works as expected.
I have this series of images transitioning one after the other using the "fade" effect.
I have tested this simple solution in all major browsers and it works fine.
We can have a different transition effect by changing the JS code. Have a look at the code below
<script type="text/javascript">
$(function() {
$('#main').cycle({
fx: 'cover',
speed: 500,
timeout: 2000
});
});
</script>
We set the speed to 500 milliseconds, that is the speed we want to have for the ‘cover’ transition.The timeout is set to two seconds which is the time the photo will show until the next transition will take place.
We can customise this plugin further but this is a short introduction to the plugin.
Hope it helps!!!
